Learn the art of creating and maintaining your very own sourdough starter with our comprehensive Sourdough Starter Recipe guide. We’ll ensure it thrives for years to come and becomes the heart of your bread-making adventures. In this guide, we offer detailed, step-by-step instructions to lead you through the fascinating process of cultivating a sourdough starter and making it a living tradition in your kitchen. What’s more, we’re thrilled to share with you a delightful Sourdough Bread Recipe that’s as easy as it is rewarding. However, feel free to use any flour you’re accustomed to or that suits your taste. Let’s get started!

In This Post
Sourdough Starter Recipe
In the days of old, a cherished tradition among mothers was passing down a sourdough starter to their daughters as they embarked on their own homemaking journeys. Some of these starters were lovingly nurtured and kept alive for generations. While it may sound peculiar, understanding the true essence of a sourdough starter reveals the wisdom in this practice.
As you may recall, every October 1st marks the beginning of my winter reading of Laura Ingalls Wilder’s Little House on the Prairie series. In By the Shores of Silver Lake, Ma expresses her hope never to consume another sourdough biscuit but she gives Mrs. Boast a starter when she admires Ma’s delicious tasting biscuits. Given the robust flavor of sourdough, it’s understandable that if your daily bread consisted mainly of it, you might yearn for something else.
Sourdough represents an ancient grain fermentation method, with records dating back to at least 1500 B.C. in ancient Egypt. It remained the primary method for leavening bread until the introduction of baker’s yeast a few centuries ago.
Sourdough starters are born from the magic of capturing wild yeast from the surrounding air, a process that was once easier in the absence of modern disinfectants. This technique has gained newfound attention in the United States, as more people explore the health benefits of fermented foods.
Traditional sourdough relies on ‘wild yeast’ and the natural lactic acid bacteria found in flour to leaven bread, endowing it with remarkable health benefits. Unfortunately, commercially available sourdough bread is not made traditionally, which results in a loss of the health advantages of authentic sourdough.
What sets sourdough apart is not just its captivating flavor but also the way it matures over time, developing a robust and distinctive taste. If the sourness or the character of the wild yeast you’ve captured doesn’t align with your palate, fear not – starting a fresh batch is simple.

Benefits of Sourdough
- Digestion is Easier
- The starches found in grains will already have started to break down in the sourdough starter before they reach your digestive system. This makes it easier for your body to digest them.
- Sourdough bread also nurtures beneficial bacteria in your gut and helps with their reproduction.
- Helps to lower glycemic index
- Certain starches are depleted in the fermenting process which makes consuming sourdough products help to keep your blood sugar from rising compared to conventional breads.
- Although the reasons are not well understood yet, some research points to sourdough fermentation possibly modifying the structure of carbohydrate molecules. This reduces the bread’s glycemic index which helps to manage your blood sugar levels.
- Gluten-sensitivity
- The process of developing a sourdough starter gives time for some of the protein gluten to be broken down into amino acids. This makes sourdough products easier to digest for those with gluten sensitivity or celiac disease.
- Because of issues we were having with gluten, we switched to Einkorn Flour. Now I use my Einkorn sourdough starter.
- This has helped our family be able to consume bread products again. This is because it has a different kind of gluten from modern wheat varieties that is easier to digest! It also is the best-tasting bread I’ve ever made.
- Less Phytic Acid
- Lactobacillus, a type of lactic acid bacteria, is found in higher quantities in sourdough bread compared to commercially made bread. This increased presence of Lactobacillus contributes to a lower phytic acid content, ultimately making more minerals available for your body’s nutritional needs.
- Less yeast
- In true sourdough bread yeast populations are reduced. This helps your body maintain a healthy level of yeast without creating problems of overgrowth that may result in Candida.
- If you’ve had to fight Candida, then you know what eating regular bread can do to the gut.
- Proven Historical Record
- Sourdough bread has a remarkable history, etching its legacy across the millennia. While modern conventional bread-making for the masses is a relatively recent development, sourdough stands as the traditional sustenance that has nourished generations of the past.
- Fewer Additives
- Sourdough bread contains acetic acid, which helps to naturally preserve bread. The best sourdough starter is made with non-GMO, organic grains like Einkorn – the original wheat.
- Better Nutrition
- The nutritional profile of sourdough bread is closely linked to the type of flour used in its preparation. Opting for ancient grains cultivated organically in nutrient-rich soil can significantly enhance the bread’s nutritional value, especially when compared to the modern wheat commonly used in conventional bread-making.
- We favor Einkorn whole wheat or all-purpose flour over modern white flour, as it offers a higher mineral content.
- The absorption of minerals can be limited by the presence of phytates in modern wheat varieties. These phytates, often considered anti-nutrients, tend to bind to minerals, restricting the body’s ability to utilize them effectively.
- However, the magic of sourdough lies in its ability to lower the bread’s pH level, subsequently reducing phytate content. This transformative process enhances the body’s absorption of essential minerals with each delectable bite.
- Whole grain sourdough bread emerges as a powerhouse of vital nutrients and vitamins, readily assimilated by your body’s digestive system.
- Remarkably, research indicates that sourdough fermentation may reduce phytate content by a significant margin, ranging from 24% to 50%, compared to commercial yeast fermentation. This reduction not only unlocks greater mineral absorption but also releases valuable antioxidants, making sourdough a wholesome choice for your well-being.
- Rich Taste
- When sourdough is crafted properly, it becomes a true delight for your taste buds. The foundation of exceptional bread starts with the careful selection of flour, both for nurturing your starter and crafting your bread.
- Our transition to Einkorn flour was a revelation. The aromatic nuances and nutty richness it imparts to our bread are truly unparalleled, elevating the sensory experience of every loaf.
Don’t let the idea of creating and maintaining your sourdough starter overwhelm you. While it might seem intricate at first, it’s a straightforward process once you grasp the fundamentals. Embrace each step with delight, and I’ll guide you through it.
I’m here to simplify the journey by sharing a straightforward method for crafting your sourdough starter and baking sourdough bread with everyday ingredients—no need to fret!
If you’re hungry for more bread-making wisdom, our sister article on making sourdough bread in a bread machine offers additional tips and insights.

Sourdough Lessons to Keep in Mind
In the 1990s, as I embarked on my sourdough journey, I had a memorable encounter with a less-than-appetizing wild yeast that left our bread inedible. It discouraged me until a wise mentor advised me to steer clear of chemical cleaners for a week or two before restarting my sourdough endeavors. Her advice proved golden.
With a successful batch, I began pondering healthier ways to maintain a clean home, concerned about the impact of chemicals on our well-being, as they had tainted my sourdough starter.
Here are some key sourdough considerations:
- Sourdough recipes are more like guidelines. Your sourdough is alive. Sometimes more so than at others. It won’t act the same every time. It’s not like anyone else’s either. It’s uniquely yours!
- Temperature plays a vital role; warmer settings accelerate development, while cooler ones slow it down.
- The age of your starter influences flavor. A mature starter yields stronger-tasting bread. Adjust the starter-to-flour ratio to customize the taste.
- A high ratio would be something like 1 ¾ cup starter to 3 cups of flour. If you prefer a lighter sourdough taste, you’ll need to lower the amount of aged starter you use in a recipe and replace the missing amount with warm water.
- Flour type affects texture, absorption, and proving time. You can choose your preferred flour while maintaining a healthy starter and delicious bread.
- It takes 3-6 days to establish a sourdough starter before breadmaking becomes possible. I have had starters be ready three days but 5-6 is a good rule of thumb.
- After making bread, refrigerate your starter and reactivate it by feeding it 2 days before your next bake.
- Store your starter in a glass jar with a loose-fitting lid or cloth cover. Metal and plastic can impart unwanted tastes.
- Old timers left their starters in warm spots and fed them regularly. Of course, they used theirs much more often than we probably do. I keep my starter in a cabinet beside my refrigerator because it’s the warmest place in my kitchen unless I take a break from using it, and then I refrigerate it.
- Refrigeration is an option for those who use their starter less often. While I am thankful for my refrigerator, we also know that off-grid living is a possibility in our unstable world. Knowing how to do things without electricity is important.
- Separation in the starter is normal. When you revive it, all will be well.
- Avoid metal utensils when working with your starter to prevent a metallic taste. I always use my wooden spoons.
- You will want to periodically transfer your starter to a clean jar to prevent mold and bad bacteria growth. You may see it beginning to grow on the sides of the jar where the residual starter likes to cling so you’ll know it’s time to change jars.
- Some people do this every time, I do it when I feel like the buildup of the starter is too great – about every 2nd or 3rd time I use it.
As you embark on your sourdough adventure, remember that it’s a journey full of discoveries and unique experiences, much like life itself.

Sourdough Starter Recipe From Scratch
- Day 1
- In a glass quart jar, combine one cup of very warm water (105-115 degrees F) with one cup of flour.
- Cover the jar with cheesecloth, a crocheted dish rag, or any loose-fiber rag to allow gas exchange. Some individuals have successfully used plastic wrap, although I haven’t personally tested this method.
- Some bakers opt to add one teaspoon of sugar at this stage. There are differing opinions on this practice. While one school of thought considers it a deviation from true sourdough, the other views sugar as a natural yeast food, making it acceptable.
- Personally, I have refrained from adding sugar to my sourdough starter for over a decade. Choose the approach that aligns with your preferences, as there’s often a middle ground between these extremes.
- Day 2
- Allow the starter to rest on the counter at room temperature for two days, ensuring it is shielded from direct sunlight.
- You can wrap a dishtowel around the jar to block out light, although I’ve observed minimal difference in outcomes with or without this precaution.
- Day 3
- On the morning of the third day, give your starter a feeding of one cup of flour and one cup of very warm water (105-115 degrees Fahrenheit), mixing thoroughly.
- Check the starter after a couple of hours. If you notice a foamy layer, you’re ready to proceed with making bread
- If no bubbles are visible at this point, wait an additional 4 hours and recheck. If bubbles have appeared, it’s time to move forward with your bread-making.
- If no bubbles have formed even after the full 6 hours, feed the starter with 1/4 cup of flour and 1/4 cup of warm water (105-115 degrees F), mix well, and allow it to sit overnight.
- Day 4
- If there is no sign of life, I mean no bubbles of any kind, it is dead and you will have to start over.
- If there is life, proceed with bread making.
- If you find that you don’t have the required amount of starter for your recipe, continue feeding it until you have both the necessary amount and an additional 1/4 cup minimum (I like to have 3/4 cup), which will serve as your ongoing starter
How to Revive a Starter to Make Bread
- If you’ve refrigerated your starter after making bread, it’s crucial to bring it back to room temperature for revival.
- To achieve this, remove the starter from the fridge and let it sit on the counter for 24 hours. Once it’s at room temperature, proceed to step 2.
- In the morning, feed your starter with 1/4 cup of very warm water (105-115 degrees F) and 1/4 cup of flour. Mix it thoroughly and cover it with a loosely woven cloth or a loosely fitting lid.
- Before bedtime, feed it again with 1/4 cup warm water and 1/4 cup flour.
- Continue this feeding routine for 2 full days, doing so both in the morning and evening.
- If a twice-daily feeding schedule doesn’t align with your routine, you can opt for once-daily feeding: provide it with 1/2 cup of warm water and 1/2 cup of flour each day for 2 full days, then proceed as usual on the third day.
- Look for signs of foaming activity after the first or second feeding. The presence of foam indicates that the yeast is active, and you can use it for bread-making if you have enough starter for your recipe plus an additional 1/4 cup for ongoing use.
- Personally, I prefer to feed my starter for two days and make bread after the third morning. This feeding process is commonly referred to as making a sponge.
- When you’re ready to make bread, pour off the required amount of starter (usually 1 2/3 cups) for your recipe.
- Return the remaining starter to your storage jar and cover it with your chosen lid.
- You can either refrigerate it or keep it in the warm, dark location of your choice.
- Depending on your family size and bread-making frequency, you can decide whether to leave it at room temperature (as the old-timers did) or refrigerate it.
- Since it’s just the two of us now, I make half of this sourdough recipe every 7-10 days, adjusting based on our menu plans.
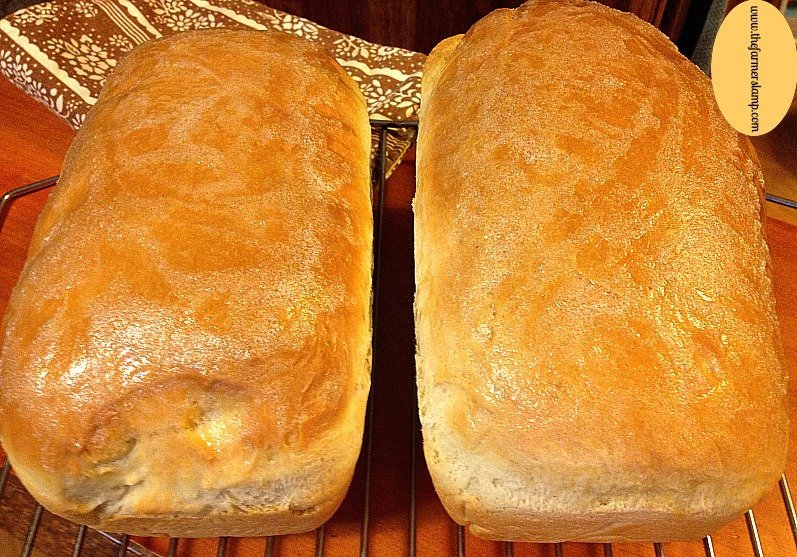
Sourdough Bread Recipe
This recipe makes two 9”x 5” loaves. To make only 1 loaf, ½ everything. The flour for one loaf is 2 ½ to 4 cups.
Ingredients
- 5-7 cups whole wheat flour or flour of your choice
- 3/4 cup warm water
- 3/4 cup milk
- 2 Tablespoons butter
- 3 teaspoons salt
- 1 2/3 cups starter sponge
- coconut oil for oiling bowls and pans
Instructions
- Scald the milk in a small pan. Remove from heat and add butter, real salt, and warm water. Let cool until lukewarm before proceeding.
- Put the starter sponge in a large mixing bowl and add the lukewarm milk mixture to the starter bowl.
- Stir in enough flour to make a medium-stiff dough. This should be 4-5 cups depending on your humidity and temperature. I prefer to use a wooden spoon, but if you prefer your mixer, use it.
- Turn the dough out onto a floured surface and use the remaining flour to knead your dough for 10 minutes. Your dough will be soft, pliable, and still a little sticky when done.
- Don’t cut the time, (if you are using most flours) this is important to activate the gluten to give your bread a nice rise and texture.
- My best tip for kneading and handling wet, tacky dough is to moisten your hands with water instead of dusting them with flour. Re-wet them every time the dough begins to stick to you. This avoids the mess of flour dust getting everywhere and keeps the bread moist as well.
- If you use a mixer to knead your dough it should only take 2-3 minutes.
- Oil a large bowl, I grease the large bowl that I mixed the dough in.
- Place the dough in the oiled bowl and turn it to coat both sides.
- Cover with a damp kitchen towel and let rise in a warm place until doubled.
- Sourdough bread takes much longer to rise than bread made with active dry yeast.
- It may take 3-6 hours for this to happen, it just depends on the humidity and temperature.
- More humidity makes shorter rising times because it allows for more expansion since the air is lighter than dry air (seems backwards I know) and cooler temps take longer for bread rise to finish.
- Lightly oil two 9”x5” bread pans.
- When the dough has doubled in size, separate it into 2 equal portions and shape it into loaves. Place them in your prepared bread pans.
- You can brush the top of the dough with olive oil or egg wash for a shiny crusty top.
- You can also sprinkle flax seeds or seed toppings on top of the loaf if desired. If you add these, gently press them into the top of the loaf.
- Cover with a towel or dishcloth and set in a warm spot to rise. I put mine on the stovetop and turn the oven on to preheat.
- This second rise should take 45 minutes to one hour.
- Preheat your oven to 400 degrees F.
- (optional) 10 minutes before you put the bread in the oven, put a pot of boiling water on the oven rack and remove it when you put your pans in. I do this to increase the humidity in the oven to create a little more rise.
- Bake for 40 minutes to 1 hour depending on your pan size, how your oven cooks, the color of loaf you want, and of course your elevation.
- Take pans out of the oven and let cool in pans for 5 minutes then remove loaves from pans to a wire rack to finish cooling. For a soft, buttery top, brush the tops with butter.
- When you remove the loaves from the pan, tap the bottom of each loaf. a dull, hollow sound means the loaf is done.
- Let the loaves cool for at least one hour before you cut them using a sharp knife.
Notes
- I like to bake my sourdough bread in my cast iron Dutch oven for a more rustic loaf. To do this, leave the dough as a whole instead of dividing it into loaves. Bake it for at least 1 hour. Check every 10 minutes after the hour if it’s not done.
- You can use any oil you like to oil the bowl and pans.
- You can use any flour you like just remember to look for texture and consistency when mixing and kneading instead of just dumping the amount called for in any recipe.
- If you choose to use Einkorn Flour, only knead for 3-5 minutes. Get more tips for baking with Einkorn flour in our sister post about it.
You May Also Enjoy
A Podcast of me answering your sourdough questions
Sourdough Bread Recipe for the Bread Machine


Whole Wheat Sourdough Bread Recipe
Ingredients
Ingredients
- 5-7 cups whole wheat flour or flour of your choice I use Einkorn Whole Wheat Flour
- ¾ cup warm water
- ¾ cup milk
- 2 Tbs butter
- 3 tsp salt
- 1 ⅔ cup sourdough starter sponge
- coconut oil for oiling bowls and pans
Instructions
Instructions:
- Scald the milk in a small pan. Remove from heat and add butter, real salt, and warm water. Let cool until lukewarm before proceeding.
- Put starter sponge in large mixing bowl and add the lukewarm milk mixture to the stater bowl.
- Stir in enough flour to make a medium stiff dough. This should be 4-5 cups depending on your humidity and temperature. I prefer to use a wooden spoon, but if you prefer your mixer, use it.
- Turn the dough out onto a floured surface and use the remaining flour to knead your dough for 10 minutes. You dough will be soft, pliable and still a little sticky when done
- Don’t cut the time, (if you are using most flours) this is important to activate the gluten to give your bread a nice rise and texture. If using Einkorn flour knead only 5 mins – see note below
- My best tip for kneading and handling wet, tacky dough is to moisten your hands with water instead of dusting them with flour. Re-wet them every time the dough begins to stick to you. This avoids the mess of flour dust getting everywhere and keeps the bread moist as well.
- If you use a mixer to knead your dough it should only take 2-3 minutes.
- Oil a large bowl, I grease the large bowl that I mixed the dough in.
- Cover with a damp kitchen towel and let rise in a warm place until doubled.Sourdough bread takes much longer to rise than bread made with active dry yeast. It may take 3-6 hours for this to happen, it just depends on the humidity and temperature.More humidity makes shorter rising times because it allows for more expansion since the air is lighter than dry air (seems backwards I know) and cooler temps take longer for bread rise to finish.
- Lightly oil two 9”x5” bread pans.
- Place them in two lightly oiled bread pans.
- When the dough has doubled in size, separate it into 2 equal portions and shape into loaves. Place them in your prepared bread pans.
- (optional) You can brush the top of the dough with olive oil or egg wash for a shiny crusty top. You can also sprinkle flax seeds or seed toppings on top of the loaf, if desired. If you do add these, gently, slightly press them into the top of the loaf.
- Cover with a towel or dish cloth and set in a warm spot to rise. I put mine on the stove top and turn the oven on to preheat. This second rise should take 45 mins to one hour.
- Preheat your oven to 400 degrees F.
- (optional) 10 mins before you put the bread in the oven, put a pot of boiling water on the oven rack and remove it when you put your pans in. I do this to increase the humidity in the oven to create a little more rise.
- Bake for 40 mins – 1 hour depending on your pan size, how your oven cooks, the color of loaf you want and your elevation.
- Take pans out of the oven and let cool in pans for 5 minutes then remove loaves from pans to a wire rack to finish cooling. For a soft, buttery top, brush the tops with butter.
- When you remove the loaves from the pan, tap the bottom of each loaf. a dull, hollow sound means the loaf is done.
- Let the loaves cool for at least one hour before you cut them using a sharp knife.
Notes
Nutrition
Storing Homemade Sourdough Bread
The bread develops a richer sourdough taste as it cools and over the next few days after baking.
- To extend its freshness, store the bread in airtight bags or containers in the refrigerator.
- I like to slice mine before storage so it’s ready to go when I am.
- Homemade bread doesn’t have the preservatives of store-bought bread, so refrigeration helps prolong its shelf life.
- If your family plans to consume the bread within 3-4 days, refrigeration may not be necessary.
- If you do refrigerate, allow the pieces of bread you plan to eat to come to room temperature so you can enjoy the best flavor.
Freezing for Long-Term Freshness
- Once your bread has fully cooled, slice it and wrap individual pieces in parchment paper.
- Place the wrapped pieces in a freezer bag or freezer-safe storage container and store them in the freezer. This method helps the bread retain its moisture and fresh taste.
- When you need bread, remove it from the freezer and allow it to reach room temperature before use. It will still taste freshly baked.
- Your frozen loaf can stay fresh for up to one month in the freezer, although it’s unlikely to last that long in most households.
There now, simple, easy, homemade sourdough bread! Told you it would be so easy. You may prefer making sourdough bread in your bread machine. I use the bread machine method during the hot summer.
Frequently Asked Questions about Sourdough Starter
- What makes a good sourdough starter?
- A quality starter is a mix of flour and water that captures wild yeast from the air. It’s the heart of your sourdough bread, giving it that unique taste and texture.
- How do I start my sourdough starter?
- Combine equal parts of flour and warm water in a jar. Cover it loosely to allow air in but keep contaminants out. The right environment and patience are key. You’ll find detailed instructions in the article.
- How long does it take for a sourdough starter to be ready?
- It typically takes about 3-6 days. You’ll know it’s ready when it’s bubbly and has a pleasant, slightly sour smell.
- How often should I feed my starter?
- Feed it daily if it’s at room temperature, or weekly if refrigerated. It’s like tending to a little part of your family – regular care is essential. You’ll find detailed instructions in the article.
- Can I use different types of flour for my starter?
- Absolutely! Feel free to experiment with various flours. Each type lends its own character to the starter and the bread. I use Einkorn Flour to make my sourdough starter.
Wrap UP
Remember, a sourdough starter recipe is a living tradition that has endured through generations. Its adaptability and uniqueness shine through as each sourdough starter takes on a distinct character.
The choice of flour, such as nutrient-rich ancient grains like Einkorn, greatly influences both the flavor and health benefits of your bread. Embrace the art of sourdough, as it’s not a rigid recipe but a journey with variables like temperature, flour type, and starter age, making each batch an exciting creation.
Maintaining your sourdough starter is simpler than it seems, involving regular feedings and adjustments to fit your schedule. Proper storage ensures that your homemade sourdough remains fresh and enjoyable, whether refrigerated or frozen.
Beyond nourishing your body, sourdough nourishes traditions, offering a unique opportunity to share this timeless practice with loved ones. As you continue your sourdough journey, may your loaves rise high, your crusts crisp to perfection, and your taste buds savor the ancient flavors of this beloved bread-making art. Here’s to creating lasting memories through the joy of this sourdough starter recipe!


Hi Rhonda, I live in SW Colorado where we have low humidity; to day in the kitchen it’s 19%. The last few loaves look great when baked however when their sliced the loaf is sooo dense and heavy it doesn’t seem to have enough rise and not finished baking. I just prepped another starter; my last one died in the refrigerator.
Mark, It sounds like there’s an altitude issue going on. I would say you need a longer proof, avoid overmixing, and a longer baking time. Try increasing the proving time by at least 30 mins, and the baking time by 15-30 minutes depending on the color of crust you want. I hope this helps and your next attempt is successful. Please let me know if I can help further.
Hi thank you so much for all the wonderful information. You’ve given me enough encouragement I’m gonna try it for myself finally. The question I have is if I want to share some of my starter with someone what is the best way to go about doing that and do I have to do anything to my remaining starter? Thank you so much.
Amy, I’m thrilled to know you are going to dive into the world of sourdough. You won’t be sorry. I’m here to help in any way I can. You can email me or leave a comment and I’ll get back to you asap. Now to your question. Yes, you can definitely share your starter. When you need to feed it but don’t want to use it, you can feed it and give them what you would take from it if you were going to make bread OR you can give them some from your live starter and they can feed and grow it from that. If you share with someone you don’t have to do anything to yours except feed it so that you will have enough for your next baking. I hope this answers your question. If not, let me know.
I was excited to try this basic bread. I’ll say right up front we have very low humidity here; 30% today. I got my starter going the other day and it looked healthy a couple days later so I went for it. It took over night to give any indication of a rise still I went for it. The bread took 55 min to bake. It looks Wonderful. I brushed with butter at 50 min. and let it brown, 5 more min. It smells so good this morning in the Kitchen. I modified the pan coating; after coating the pan with butter I coated the butter with corn meal. It doesn’t stick to the flour dough. The loaves slid right out.
I missed the hit to put a bowl of water in the oven 10 min. prior to baking. I’ll definitely try that next time, I might get more of a rise as you say. I’m satisfied with the rise I did get. It all good. Thank you for sharing this recipe.
Thank you so much for sharing your experience with us and for being a part of our Community! So glad your bread turned out well.
Can I use oat flour?
Hi Carol, I have never personally used oat flour, but I have seen on the internet and YouTube other people saying they have used oat flour for sourdough starter. I’m certain it would require an adjustment to the liquid proportions since oat flour is especially “thirsty”. Thanks for asking such a great question. I’ve asked my homestead blogging friends if they have a post or know of someone who has tried oat flour for this purpose. If I hear something that will help you, I’ll reply again here.
If you try it, let us know how it goes.
[…] Simple, Easy Sourdough Bread From Scratch ~ The Farmer’s Lamp […]
[…] Download Image More @ thefarmerslamp.com […]
This might be a stupid question but how does one alwaya keep a starter going? Keep feeding what remains after taking part out to make a loaf?
No question is stupid, wee all had a time when we didn’t know so ask away. Yes, you have to keep feeding the starter. Ideally, if you keep your starter at room temp on the counter, you have to feed it twice a day. However this is a laborious process. What I recommend is to keep it in the fridge and feed it once a week.
Thank you! Getting a starter going tonight !!
I read that if a starter has sugar in it then it is not a true wild caught sourdough starter. What say you about this. Confusing, all this information.
That’s a hot topic there, Becky. I only add sugar to mine if it’s not “growing” fast enough. That means it’s alive from what it’s caught in the air, but needs a boost or at least I think it does. In truth, if I let it sit long enough and feed it often enough, it’ll grow without the sugar boost. I guess it’s a personal preference kind of thing? As Papa would say, there’s as many ways of getting something done as there are people who do it 😉
[…] Farmer’s Lamp gives us a simple and easy way to make a starter for the […]
Thanks for including me, Jess! 🙂
[…] Simple and Easy Sourdough From Scratch? Why, Yes! […]
Dear Rhonda, thanks for this recipe I’m going to make my starter and “get started” with sourdough bread making. Also, I printed out the recipe but got an additional 6 pages of ads down the righthand side of the sheets of paper and the comments. So, if you’re espousing the greenprint then maybe they should deliver what you’re thinking they are. RobbieAnn
Thanks Robbie for letting me know. I’ll check the plugin. Cleanprint has never printed ads before…I’m sorry for the inconvenience. Thanks for letting me know.
[…] 6) If you want to make this a sourdough recipe, use 1 cup sourdough starter and 1 ½ cups warm milk as the liquid. Use only 1 package of active dry yeast. Learn how easy it is to make your own sourdough starter. […]
yum!!! That bread looks delicious. This is something I’ve never done before but it’s on my list. Part of the hang up for me has been the idea of having to buy a starter, so it looks like I’ve run out of excuses for not trying. Thanks so much for sharing at Simple Lives Thursday; hope to see you again this week!
[…] Simple and Easy Sourdough From Scratch? Why, Yes!. […]